Common Lens Mistakes Beginners Make — and How to Avoid Every One of Them
A photography instructor once described the first year of serious photography as ‘an expensive education in what not to buy.’ He was not being unkind. He was describing a pattern he had watched repeat itself in every cohort of students he had ever taught: enthusiastic beginners, armed with genuine passion and a credit card, making a predictable sequence of purchasing and practical errors that cost them money, cost them photographs, and occasionally cost them the motivation to continue.
The mistakes are not random. They cluster around a handful of recurring misunderstandings about how lenses work, what photographers actually need, and how the gap between equipment capability and photographic skill plays out in practice. Name them, understand why they happen, and they become avoidable.
This post names them.
Common Lens Mistakes Beginners Make:
Mistake One: Buying the Wrong Focal Length for the Subject
This is the most common and most consequential mistake a new photographer makes, and it flows directly from not understanding — or not applying — the relationship between focal length and subject that the earlier posts in this series have laid out.
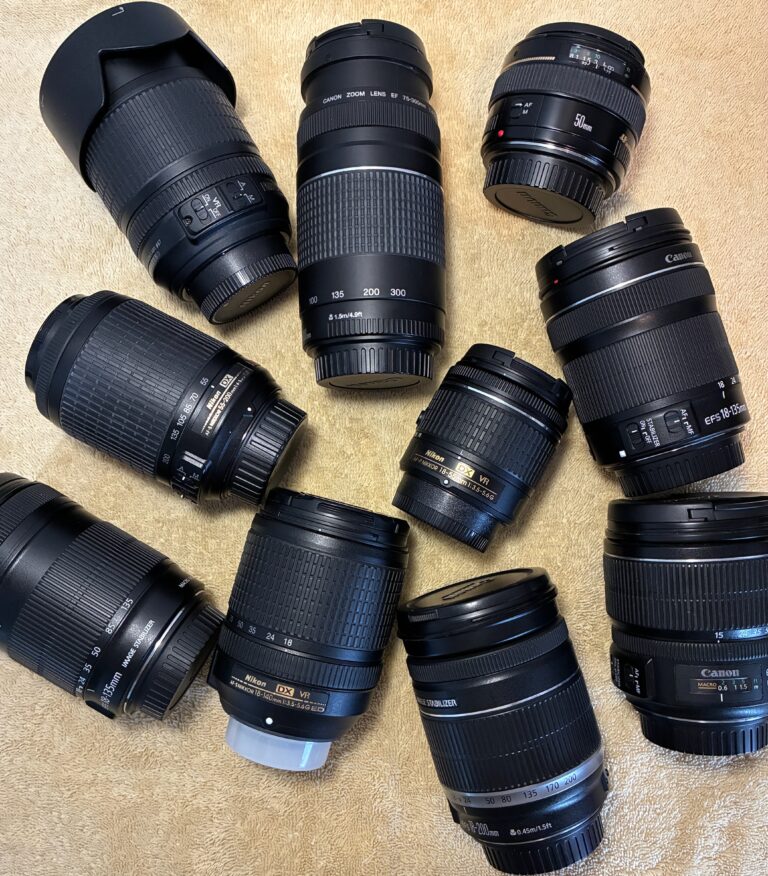
The wrong focal length does not just limit your images. It makes certain images physically impossible. A 50mm lens cannot photograph a bird on a distant branch in any meaningful way regardless of how skilled the photographer is. A 16mm lens will make the subject of a tight portrait look like a caricature regardless of the lighting or the expression. The focal length either serves the subject or it does not, and no amount of technique compensates for an optical tool that is wrong for the job. See these various lenses here.
The mistake usually happens because the photographer buys a lens based on price, or because it came bundled with the camera, or because a review described it as versatile — without first asking whether it covers the focal length range their specific photography demands. A wildlife photographer who buys a 35mm prime because it received excellent reviews has bought an excellent lens for the wrong purpose.
The fix is simple and has been the thesis of this entire series: define what you photograph first, identify the focal length requirements that subject imposes, and let those requirements drive the purchase. Not the other way around.
Common Lens Mistakes Beginners Make:
Mistake Two: Underestimating How Much Aperture Matters
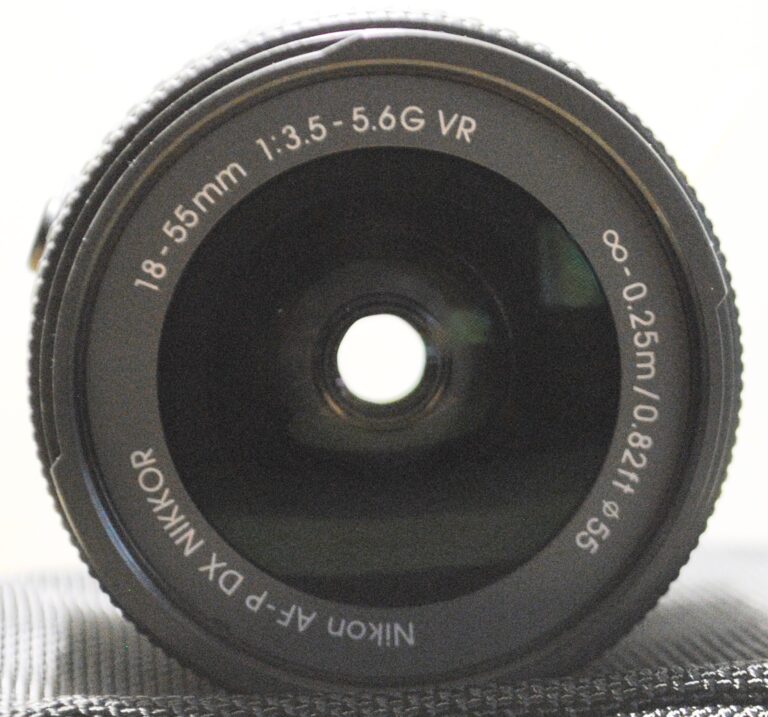
New photographers frequently buy lenses with slow maximum apertures — f/4, f/5.6, the variable f/3.5-5.6 of kit zooms — without understanding what those aperture values mean in practice until they are standing in a dimly lit venue watching their shutter speed drop to a sixteenth of a second and their images blur into impressionist paintings.
The connection between maximum aperture, available light, and usable shutter speed is not abstract. It is the difference between coming home from an indoor event with sharp, usable photographs and coming home with a memory card full of blurred, noisy disappointments. Every stop of aperture — every doubling of the aperture area — doubles the light available to the sensor, which allows either a faster shutter speed or a lower ISO or both. The difference between f/1.8 and f/5.6 is four stops — sixteen times more light. That is not a marginal advantage. It is the difference between working and not working in many real-world conditions.
The mistake is compounded by the fact that aperture affects background separation as well as light gathering. A photographer who wants the subject-separated-from-background look that characterises professional portraiture cannot achieve it with a slow lens, regardless of how expensive the camera body is. That look is an optical property of a wide aperture, and it is not available at f/5.6.
When budgeting for a lens, the maximum aperture is not a luxury specification to be traded away for a lower price. For anyone photographing people, events, or any subject in variable or low light, it is a functional requirement. A slower, cheaper lens that cannot be used in the conditions you actually shoot in is not a bargain. It is an expensive piece of glass that stays in the bag.
Common Lens Mistakes Beginners Make:
Mistake Three: Buying a Superzoom as the Primary Lens
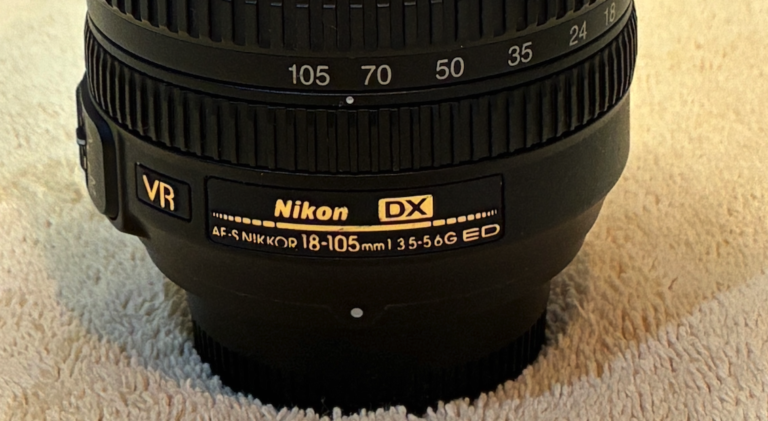
The appeal of the superzoom lens — 18-300mm, 28-300mm, 18-400mm — is entirely understandable. One lens that covers everything from wide-angle landscapes to distant wildlife sounds like the rational solution to the lens selection problem. Buy one lens, solve all problems, spend less money.
In practice, the superzoom is one of the most common sources of photographic disappointment among beginners, because the optical compromises required to cover such a vast focal length range in a single barrel are significant and show clearly in the images.
Covering fifteen times the focal length range of a standard zoom requires a complex optical formula with many elements and significant engineering compromises. Maximum aperture is slow throughout the range and becomes very slow at the telephoto end — typically f/6.3 at 300mm, which is limiting in any light below bright sunshine. Sharpness at the extremes of the zoom range is noticeably reduced compared to a dedicated lens at the same focal length. Distortion, chromatic aberration, and vignetting are harder to control across such a wide range and are more visible in the images.
The superzoom is a legitimate tool for specific situations: travel photography where minimising bag weight is the priority, casual family documentation where convenience outweighs image quality, or as a backup lens for situations where changing lenses is impractical. For a photographer who wants to develop their craft and produce images they are genuinely proud of, it is a poor foundation. Two well-chosen lenses with overlapping coverage will outperform a superzoom optically in every focal length they share.
Common Lens Mistakes Beginners Make:
Mistake Four: Ignoring the Crop Factor
This mistake has been covered in detail earlier in this series, but it recurs often enough in purchasing decisions to deserve mention here.
A photographer with an APS-C camera body who buys a 50mm lens expecting a standard natural perspective will find instead that they have an 80mm equivalent — a short telephoto. For portraiture this is actually excellent. For street photography or general documentary work where they wanted the natural perspective, they have missed the mark. The correct lens for a natural perspective on an APS-C body is a 35mm prime, not a 50mm.
The error compounds when buying telephoto lenses. A photographer who needs 400mm equivalent reach on an APS-C body only needs a 270mm physical focal length, because the 1.5x crop factor provides the additional reach. Buying a 400mm lens for an APS-C camera gives 600mm equivalent — possibly more than needed, and certainly heavier and more expensive than necessary.
Before any lens purchase, confirm your camera’s sensor size and crop factor, calculate the full-frame equivalent of the focal length you are considering, and verify that the equivalent serves your actual photographic purpose. This takes two minutes and prevents expensive mistakes.
Common Lens Mistakes Beginners Make:
Mistake Five: Buying New When Used Delivers the Same Result
This mistake does not affect image quality directly, but it affects the quality of the kit a photographer can build within a given budget, which affects everything.
The reluctance to buy used lenses is understandable. It feels like a risk. What if there is something wrong with it? What if it does not perform as well as new? These concerns are legitimate in the abstract and largely unfounded in practice when buying from a reputable source that tests, grades, and stands behind their stock.
A well-maintained used lens in excellent condition produces images identical to the same lens new. The glass does not degrade with moderate use. The coatings remain effective. The optical formula is unchanged. The photographer who buys used and spends the price difference on a second lens has made a materially better decision than the photographer who bought new and owns only one lens.
The practical rule is straightforward: buy used from dealers who test and grade their stock honestly, understand the condition ratings, know what to look for optically, and do not mistake cosmetic wear on a barrel for optical compromise. A lens with a small scuff on the barrel that photographs superbly is worth more than a pristine lens that performs poorly.
Common Lens Mistakes Beginners Make:
Mistake Six: Chasing Sharpness Above All Other Qualities
Sharpness is the quality that photography forums discuss most obsessively, and it is genuinely important. But it is not the only quality that matters in a lens, and optimising exclusively for sharpness at the expense of other optical characteristics produces photographers who make technically correct images that are somehow unsatisfying.
The character of a lens — the way it renders out-of-focus areas, the quality of its tonal transitions, its behaviour in backlit conditions, the way it handles flare — contributes as much to the feel of an image as its resolution. Some of the most beloved portrait lenses in history are not the sharpest lenses ever made. They are lenses with a particular rendering quality that flatters subjects and creates images with a specific aesthetic that photographers and clients respond to emotionally.
When evaluating a lens, look at actual photographs made with it, not just resolution charts. Ask how the out-of-focus areas look. Ask how it handles high-contrast backlit situations. Ask what the colour rendering is like. These qualities are harder to quantify than sharpness but they are what you will live with in every image the lens produces.
Common Lens Mistakes Beginners Make:
Mistake Seven: Not Buying a Lens Hood
This is the smallest mistake on the list and possibly the most persistently made. The lens hood — the cylindrical or petal-shaped attachment that fits over the front of the lens — is not an accessory. It is part of the optical system.
Its primary function is to prevent non-image-forming light from striking the front element at oblique angles and causing flare and contrast reduction. When the sun is in or near the frame, or when a bright light source is just outside the frame, stray light hitting the front element scatters inside the barrel and washes out shadow detail, reduces contrast, and creates artefacts. The lens hood blocks this light before it reaches the glass.
Its secondary function is physical protection. A lens hood absorbs the impact of minor knocks and bumps before they reach the front element. Many front elements that would otherwise have been damaged by a careless contact with a doorframe or a bump against a wall have been saved by the hood taking the impact instead.
Most lenses ship with a hood or offer one as an optional accessory. Use it. Always. The only situation where removing it is justified is when using a circular polarising filter that needs to be rotated, or in certain flash photography configurations where the hood causes a shadow in the frame.
Common Lens Mistakes Beginners Make:
Mistake Eight: Cleaning the Lens Too Often and Too Aggressively
New photographers, anxious about the condition of their equipment, often clean their lenses far more frequently than necessary and with more vigour than is good for them. The result is the coating damage described in the previous post — fine swirl marks from abrasive cloths, or cleaning solution residue from improper technique, that accumulate over time and degrade the very surface the photographer was trying to protect.
Dust on the front element of a lens does not affect image quality in normal shooting. A few dust specks are invisible in photographs and should be left alone. The front element should only be cleaned when there is a smear, fingerprint, or deposit that is actually affecting image quality — and it should be cleaned using a proper lens cleaning cloth or lens tissue with minimal pressure, or a blower brush for dust, never a paper tissue or clothing.
The rear element deserves more care because it is optically closer to the sensor, and deposits there have a proportionally greater effect on image quality. But the same principle applies: clean when necessary, not on a schedule, and always with appropriate tools and technique.
Common Lens Mistakes Beginners Make:
The Pattern Behind the Mistakes
Looking across these eight mistakes, a pattern emerges. Most of them share a common root: making purchase and usage decisions based on general enthusiasm, marketing, or forum consensus rather than on the specific requirements of the specific photography the photographer is actually doing.
The cure for almost every mistake on this list is the same question applied rigorously and honestly before every purchase: does this serve what I am actually photographing, in the conditions I actually shoot in, at the quality level I am genuinely trying to achieve? If the answer is clearly yes, buy with confidence. If the answer requires justification, wait.
The next post addresses the practical side of owning used lenses — how to care for them, store them, and spot the early warning signs of issues before they become problems.
— — —
Next: Maintenance and Care of Used Lenses — Keeping Your Glass in Peak Condition